
The nerve-racking part of building a garage on a slope is constructing the foundation and the foundation footing. The footing is very important to the entire garage foundation and structure. Your garage will rest on the foundation, and the foundation will rest on the footing.
There are two commonly used foundations in construction, the T-shaped foundation and the slab on grade foundation. The best way to build a garage on a steep slope is to use the step-slab on grade foundation for better support and structural reinforcement. A step foundation will help reduce excavation costs and time.
To construct a step foundation, you will dig some form of stairwell towards the slope, install foundation footing, and then compact the ground so that you can apply concrete to the foundation.
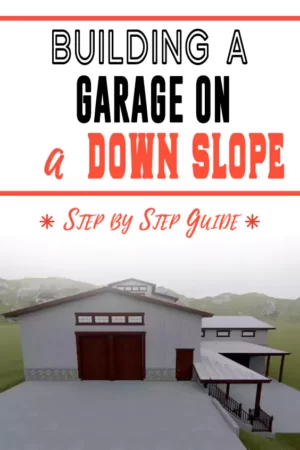
Can a garage be built on a down slope?
It’s a common conundrum for homeowners. You have a sloping property and you plan to build a garage. The question you might be asking yourself is, can a garage be built on a slope? Yes, you can build a garage on a down slope. Once you figure out how to construct your detached garage foundation on a hillside, the rest is pretty simple.
The process of building a garage on a hill, steep, or gentle slope can be expensive. When building your garage, you need to take precautionary measures to prevent soil erosion which might compromise your structure, and install a solid drainage system to waterproof your garage.
You might need to test the soil of where you intend to build and the surrounding area for terrain stability just to be extra safe.
All these will cost you money, so how do you construct a garage on a slope without breaking the bank?
You can utilize experts for certain design elements and do a lot of the heavy lifting yourself. Knowing the process will help you determine where you can move forward and where you may need help.
7 Steps to Build a Garage on a Down Slope
Assuming you have already decided the design of the garage, what materials and tools do you need to build your garage?
Materials
- Fill Dirt or Soil (Get approved fill soil)
- Size four rebar
- Concrete
- Concrete form boards
- Rebar bender
- Hammer
- Wooden stakes
- Theodolite
- Shovel
- Perforated pipe with a 4 inch diameter
- Gravel
Step 1: Determine the garage area
The first step to constructing a garage on a slope is to determine how much the area of construction slopes by measuring the length and width of the garage layout.
The next step is to stake out the four garage corners. This will help you determine the amount of excavation work is required.
Step 2: Mark the construction ground
Start by marking the four corners of the garage. Measure both the length and width and use the hammer to drive the stakes deep into the ground.
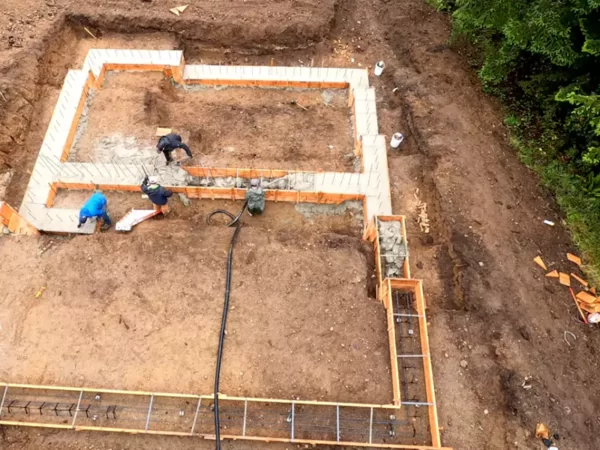
Depending on the length and width of your garage, you might need to install two or three-step footings. To achieve the steps you will need some amount of excavation. The next step is to excavate and prepare the grounds.
Step 3: Prepare the ground
At this point, you need to dig out the dirt. Take the first layer of soft soil that can easily erode out. You can choose the DIY method of excavating the soil, such as using a digging shovel like the Hooyman Shovel*. Alternatively, you can rent or buy an excavator, which will likely cost money, but it will save time.
From your soil test, you will know whether you need fill soil. If it is necessary, pour the fill soil and use a compactor to compress the ground.
Start digging and forming the step footing for your garage concrete foundation on a slope. Excavate the foundation footing for where you will install the walls. Get the actual measurements according to your structural design guidelines. You want to have the precise height, width, and length of the footing.
For instance, an 18inch by 18-inch footing will be 18 inches wide and 18 inches deep. The steps footing usually bend at a 45-degree angle.
Use a theodolite the get the slant angles right. A theodolite is a precision tool for measuring angles. It is typically used by land surveyors. They start at about $500 and can cost thousands. This may be an appropriate time to consult a professional about the appropriate angles. They can do the measurements and you can do the heavy lifting.
Once the footings are ready, the next step is to install the perforated pipe to waterproof your garage.
Step 4: Waterproof your foundation
Lay perforated water pipe from one end to the other just next to where the garage door slope is. Use gravel to cover the pipe. The pipe is meant to collect and drain water from your garage.
Step 5: Install the concrete form boards and the rebars

Start by installing concrete form boards all-around the foundation footing, including the steps. These boards outline where your concrete will be poured. Lumber cut to size is commonly used as form boards.
Then install the rebars both horizontally and vertically from the ground up. Your structural design should have the measurements on how you need to install the rebars.
On top of the stem wall, you will need to bend the rebars so you can attach them with the concrete slap rebars that will make the garage surface. Some structural engineers may require that you pour the footing concrete and stem wall concrete at the same time to create a monolithic structure. If your design doesn’t have these specifications, it is a good time to consult with a structural engineer .
However, it might be easier to fill the footing concrete first, then the stem wall. Whichever the case the next step is to pour concrete.
Step 6: Pour the concrete
Start by pouring concrete for the footing foundation, followed by the stem walls. For the walls, you can go ahead and install the anchor bolts. Whether you get to do it the same day or the following day, pouring the concrete to create the surface slab is the final foundation step.
Before you pour the concrete slab you need to add and compact fill soil. Then add the top rebars then add the concrete on top. Once you have smoothed out the concrete, you can leave it to set and cure. The next step is to put up the wall, roofing, and final finishes of your garage.
Step 7: Install the garage structure and finishes
The foundation is an integral part of the construction, especially when you want to construct a garage on a slope. Now constructing the foundation is over the rest is easy.
You can now install your walls. Once the walls are up, the next part is the garage door roof. From this point, it is easy to make the final finishers like the ceiling, electrical works, garage door, and painting.
Read more about garage finishes in these guides:
- How to Insulate a Garage Ceiling with Foam Board
- How to Clad a Garage Door with Wood
- Differences between Vinyl Back and Steel Back Garage Doors
Now that you know how to build a garage on a slope, you might be wondering about the cost.
Is it expensive to build a garage on a slope?
If you are wondering if it is expensive to build on a slope? The answer is yes. The cost varies from the materials required to excavation cost, soil test analysis, preventing erosion, labor, and waterproofing your building.
However, you can manage and reduce expenses by doing some of the things yourself and sourcing labor help from family and friends.
In an attempt to save money, you might yourself forgoing the building and structural standards, but this will compromise your entire structure. Do not hesitate to reach out to structural engineers or local building code experts if you have a question.
Summary
Now that you know how to build a garage on a downslope, you have also established that the foundation is the most crucial component.
You also know the best way to build a garage on a steep slope is using a step foundation as it creates a better structural bond that reinforces your foundation and the whole structure.
The foundation will make or break your hillside garage. Once you have the foundation right, the rest falls into place.
You might need a structural engineer’s input and services. A structural engineer will help you ensure that your building is strong stable and rigid in the long run especially since you are building the garage on a sloping pad.
*Paid Link: As an Amazon Associate, I earn from qualifying purchases. Should you decide to purchase a tool through this link, I will get a small commission. The price of the tool won’t be any different to you.
Recent Posts
Many DIY lovers and engineers want to build something cool in their garages. What's cooler than a kit airplane? In this setup, the builder receives parts and puts them together in their own space....
Diamond blades have various uses, from cutting tiles and glass to cutting gems and semiconductor materials. If you’re planning to start a renovation or building project, you’ll need a diamond...