
Most air compressors will cost a lot of money, especially if you buy brand new. Buying used is an option but how do you know how long it will last? Instead, you can build an air compressor from your old refrigerator.
A typical refrigerator compressor can push around 1 CFM (Cubic Foot per Minute) air at a pressure of 500 plus PSI.
This is good enough to make a medium-strength air compressor. You’ll only need two major elements: a compressor from an old refrigerator, and an air tank.
Other items include tubes, copper valves, drill machines, a grinder, a soldering machine, and a few screws and you’re ready to go.
This detailed guide will explain how to make an air compressor from an old refrigerator with a few simple modifications.

How to Make an Air Compressor from an Old Refrigerator: 5 Steps
Step 1: Get a Refrigerator Compressor
To build your own air compressor you will need a refrigerator compressor. You can either buy a used compressor from hardware shops or can purchase one online. If you have a running refrigerator, you can also salvage the compressor from it.
- When you buy from a store, all tube openings are usually soldered to avoid any blockage. You’ll need to open those tubes. Get an angle grinder, and cut off the soldered ends.
- If you’re salvaging from a refrigerator, try to keep as much tubing as possible. You’ll need the input and output tube, one extra tube that goes to the refrigerator system will need to be shut. Also, save as much wiring as you can.
To check if the compressor is working correctly, plug it in and see if it operates. If the compressor turns on, you can use it to build a new air compressor.
Step 2: Get a Pressure Tank
The compressor will need a reservoir of air, which is used to hold the pressured air. You can use a fire extinguisher cylinder, LPG fuel tank, or cylinder from an existing compressor unit.
We will be using a tank from an existing compressor unit. It’s much cheaper and easy to install since it already comes with valves, pressure switches, and mounting stands.
Clean any dirt, dust, and rust from the tank to avoid clogging the compressor. This also might be a good time to paint if you want to.
Step 3: Connecting the Compressor Tubing
Refrigerator compressors come with three openings.
Discharge: It gives an output from the air compressor. We will connect it to the input valve of the tank.
Suction: It is used for Input. We will connect it with the air filter. (Can be left as it is, as it pumps in the air.)
Process: It also works as Input; you can use these alternatively. One of the openings (suction/Process) has to be sealed so we will seal the ‘Process’ opening.
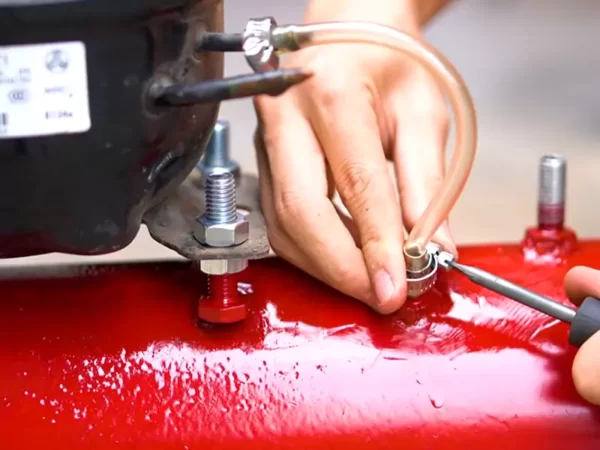
Connecting Output with the Tank
A copper male-female valve is perfect for making safe connections. Use a rubber washer in between to block potential leakage and attach a high resistance tube with help from a valve.
Water Separator filter- It is recommended to attach an oil and moisture trap valve between the compressor output and tank input.
A water separator ensures that your air handler doesn’t get greasy from contaminants floating in the air, such as water and oil vapors, solid particles, etc. Fix this water separator unit with the compressor or you can later mount it directly over the tank with the help of a metal plate.
Connecting Input with the Air Filter
Refrigerator compressors are not designed to function with all the small particles in the air. So, we’ll use an air filter on the input vent to keep it efficient for a long time.
Fix the air filter to the input vent, or attach it to a tube and then fix the tube to the vent.
Some people prefer to put the filter at the output from the cylinder. You can use your own judgment on how to arrange the filter, but keep in mind that the compressor should be protected from moisture and dust as much as possible.
Step 4: Installing a Pressure Switch

A pressure switch is a very important safety feature. It shuts down the compressor when the air pressure reaches 10 bar or above.
If you are using a CO2 tank or an LPG cylinder, you’ll need to fix a pressure valve regulator set with the compressor connection on the tank.
However, tanks with compressor units come pre-installed with the pressure switch. You’ll only need to wire it in a series connection with the electrical switch of the compressor.
Step 5: Mounting the Freezer Compressor on the Tank
Once your compressor unit and cylinder are ready it’s time to mount the compressor and on the tank. There are two methods to do it.
You can either weld the unit directly over the tank or fix it by screwing a metal plate with the tank. The aluminum metal plates are recommended with compressor tanks. So, we will also follow that method.
- You will need an appropriate size aluminum plate, enough to hold both the compressor unit and a pressure valve set.
- Drill M6 size holes with a power mill. Make 4 holes for fixing the compressor unit and two additional holes at the rear for the safety pressure valve unit.
- Fix the aluminum plate with the stand on the tank. Now screw the compressor unit on it, keep the rubber pads if it has any. These pads reduce the effect of vibrations.
Secure each part tightly and your air compressor is ready to work.
How to Modify a Fridge Compressor Into a Silent Air Compressor?
The 2 Stage air compressors produce loud, obnoxious noise and can go as high as 60 decibels. Whereas a refrigerator compressor operates on the same principle but produces a low humming that often goes unnoticed.
When you modify a fridge compressor into a new air compressor, it will not only be cheap and effective, but it’s also quiet.
- Get a compressor from an old fridge and an appropriate tank for filling compressed air. Make sure the compressor is working. Clean both the compressor and tank to prepare for the necessary modifications.
- Connect the compressor with the tank using copper valves and tubes. Install a water separator between the output from the compressor and input to the tank. Now fix an air filter at the inlet valve. Choose a filter with a larger diameter to allow more air and eliminate any sound because of airflow.
- Install the pressure switch to the operation for safety. Mount your compressor safely on the tank. You can use a metal plate for fixing or directly weld both parts. However, using a plate is recommended method. Secure the system tightly and your silent air compressor will be ready to use.
Making an air compressor out of an old fridge has a lot of advantages and is very simple to do. The best feature is its low noise emissions, these units are much quieter than commercial types. It also offers an affordable alternative since we are using recycled parts from an old refrigerator. This air compressor can be used for a variety of purposes including filling up tires and powering blowers or air tools.
Recent Posts
Many DIY lovers and engineers want to build something cool in their garages. What's cooler than a kit airplane? In this setup, the builder receives parts and puts them together in their own space....
Diamond blades have various uses, from cutting tiles and glass to cutting gems and semiconductor materials. If you’re planning to start a renovation or building project, you’ll need a diamond...